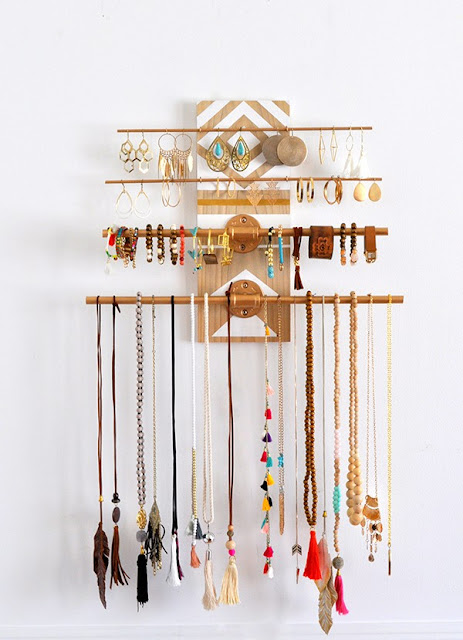
DIY Geometric Industrial Wall Jewelry Organizer
Supplies:
- Wood Plank: Mine was 7 x 1 x 19
- Acrylic paint: White, gold, copper
- Blue painter’s tape
- 2 Plumbing floor flanges (Lowe’s)
- 2 Galvanized T’s: Size 1/2 inch
- 2 Galvanized steel pipe nipples: Size 1/2 inch x Close
- 4 Screw eye hooks,size 1 1/8 in, gold if possible, (Lowe’s)
- 8 Wood screws that fit the flanges
- 2 Wood Dowels: Size 5/8 x 36 in. (Lowe’s)
- 1 Wood Dowel, in the smallest size or size that will fit through the eye of the hooks (Lowe’s)
- Metallic Gold spray paint
- Hack saw
- Z-clip Wall Hanger
- Paint brushes
- Sandpaper
Instructions:
The piece of wood I used was a scrap
piece I had from another project. You can get pieces of cut wood at your
local hardware store. Adjust the size of the wood and add more flanges
if you like.
Lightly sand all the edges of your board.
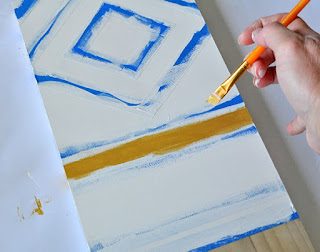
Using a ruler, measure out your pattern and lightly draw it on the
board with a pencil. Place your painters tape for your shapes.
Paint the shapes with acrylic paint.
HINT: I painted the stripe where the gold strip is white first so the gold would show up brighter on the wood.
Let the paint dry and remove the tape. Gently wipe away the pencil marks with a wet rag.
Spray paint your both of the flanges,
galvanized T’s, all four eye hooks (if needed) and all three dowels with
the metallic gold paint. Let it dry.
Cut down the dowels to different sizes
with a hacksaw. My dimensions starting from the top are: #1 is 19
1/2inches, #2 is 21 1/2 inches, #3 is 22 inches and #4 is 24 inches.
Paint the ends of the dowels gold.
Place a floor flange in the bottom center
of your board and secure with screws. Add the next flange above the
bottom one and secure with wood screws. Screw in the nipples to the
flanges, then screw on the Galvanized T’s and tighten. Touch up screws
with the acrylic copper paint, (it matches the metallic gold spray paint
I chose perfectly).
When I added the larger dowels into
the galvanized T’s, the dowels would not fit snug, they would turn and
were a bit loose in the T’s. I hammered a small piece of the small
wooden dowel to break it up and then I inserted it into the T’s as a
wedge to tighten the dowel’s so they will not turn. Worked perfectly!
Add your Z-clip picture hanger to the
back of the wood. Mount it to the wall, then add the eye hooks and
insert the small dowels. Hang your jewelry and that’s it! So cool I love
it! I am so pleased with how this project urned out! It looks fabulous
in my closet.
NOTE: I used the
Z-clip at the advice of one of the other bloggers. My set holds up to
75lbs. The flanges and T’s are pretty heavy you need to secure the
Jewelry holder to the wall for the added weight.


Comments
Post a Comment